We want to make it as easy as possible for our customers to upgrade or maintain their equipment, quickly and most of all safely, and in the case of bandsaw blades, there is a lot to get right.
This step by step procedure is useful as it is very similar for most models, however familiarity with your machine, its manuals and how to operate it safely are important. If aligning your bandsaw blade isn’t a task you feel confident in undertaking, now is the time to speak up, take a back seat, watch and learn.
It is important to fit any component safely and methodically, so here is our step by step guide on how to check and correct blade wheels and guides when installing a new blade on a metal-cutting bandsaw:
Power and PPE
Power it off and remove the plug from the electrical socket… do whatever needs to be done to ensure that your machine is well and truly off, and as with all other tasks in the workplace, ensure that PPE is where it should be; on you!
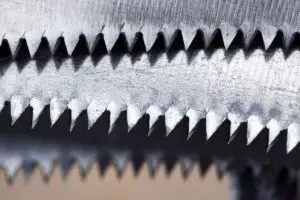
Out with the old
Raise your bandsaw’s upper arm allowing access to the cover, then remove the cover, don’t forget to release the tension on the blade before you try and remove it from the machine. Remember that PPE in we mentioned in step one? Gloves are important at this point; carefully remove your old blade.
In with the new
With the old blade consigned to history, it’s time to replace it with the new one, remember that the guides will need to be retracted at this point to accept the wider blade. Typically just one side will be adjustable, so loosen the locking nut on this side before carefully turning the mounting shaft to spate the bearings on both the lower and upper guides, if you’ve done it correctly, you’ll visibly see the separation as you turn.
A quick word about your new blade, it will most likely arrive coiled up, and under tension, take care when you open it out. Then place it on the wheels, adding just enough tension to keep it where it should be.
At this point, we need a little power, to run the machine very briefly, forcing the new blade to sit correctly on the wheels. When that is done unplug the machine once again.
Visual inspection
Ok, our new blade is sitting comfortably, remember a properly tracked blade should be close to, but shouldn’t touch the rear bearing support or the back shoulder of both blade wheels….at least not yet, but that’s all about to change.
To get your optimal setup, at this point you need to adjust the blade wheel so that it is touching the blade, something that will keep the blade straight and give you the best performance when cutting. You know you’ve got it right when the bearing is touching the blade but you’re still able to turn it without moving the blade itself. When that’s done your guides are set, tighten the nut back up and move onto the tracking.
Tracking
A correctly tracked blade will touch the lip on the rear of the blade wheels, but it shouldn’t ever be pushing up hard against them or have any gap where it rides forwards. Again, a visual inspection will tell you all you need to know, and any slight tracking adjustments can be made if necessary.
Testing time
Fitted, tracked correctly and guided accurately, your new blade is ready to show you what you’ve been missing, so re-connect your machine to the power, close your blade covers, lower/lock the arm above the piece you’re going to cut, and get to work, safe in the knowledge that comes with a job well done.
Published 11th October 2018