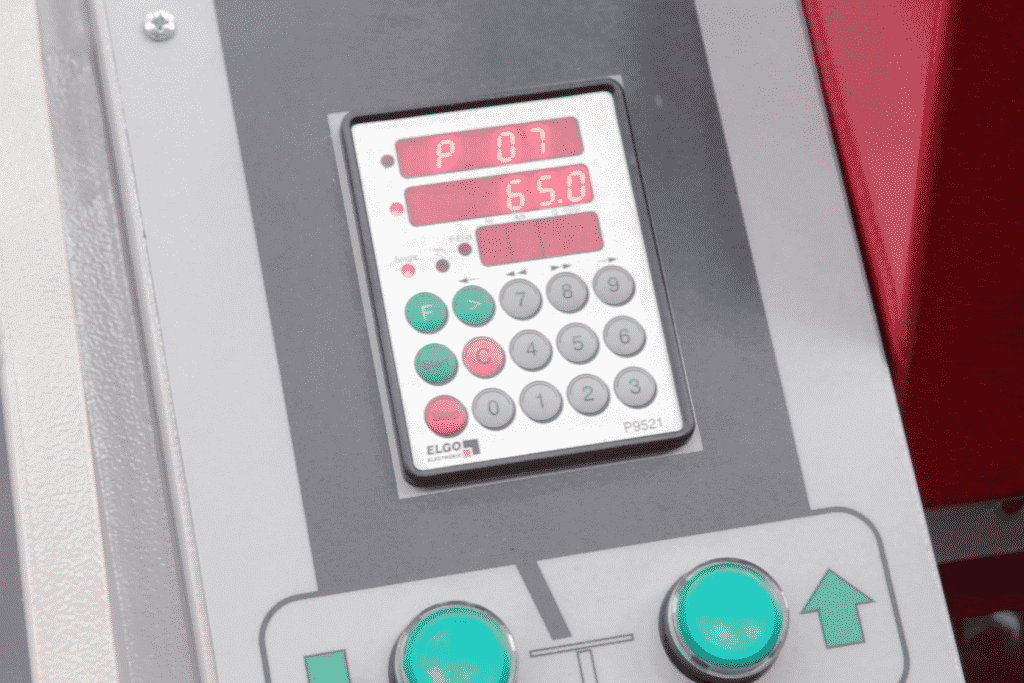
Follow our step by step guide to get your Morgan Rushworth guillotine synchronised with the Elgo P951 Controller:
Morgan Rushworth Machines with Elgo P9521 Control. With no datum switch.
- Send back gauge to 50mm and make a cut and measure it. I.E. 49.32.
- Take 49.32mm from 50.00mm = 0.68mm.
- As the machine will not allow a fine adjustment the step below must be made.
- Send Back gauge to 50.7mm and make a cut and measure, it should now measure 50.0mm.
- Press and hold F for 4 seconds and type in 98 and press > then enter 250565 and press > again, type in 07 and press > again this brings up parameter no 07, change the figure to 100.0mm and press F, the top figure will change to 100.0mm
- Press and hold F for 4 seconds press > type in 07 and press > again this brings up parameter no 07, and enter 50.0mm then press f and the top figure will change to 50.0mm you are now datumed.
- If the figure is out of calibration by a large amount, direct entry of the correct figure is possible. Simply enter the correct figure in step 5 and the machine will be datumed.
- To lock parameters just turn the power off and back on.
Morgan Rushworth Machines with Elgo P9521 Control. With datum switch.
- Send back gauge to 50mm and make a cut and measure it. I.E. 49.32.
- Take 49.32mm from 50.00mm = 0.68mm.
- As the machine will not allow fine adjustment the step below must be made.
- Send Back gauge to 50.7mm and make a cut and measure, it should now measure 50.0mm.
- Press and hold F for 4 seconds and type in 98 and press > then enter 250565 and press > again, type in 07 and press > again this brings up parameter no 07, change the figure to 100.0mm. press > then press F, then turn the datum switch and back again, the top figure will change to 100.0mm.
- Press and hold F for 4 seconds press > type in 07 and press > again this brings up parameter no 07, and enter 50.0mm, then press F, then turn the datum switch again and the top figure will change to 50.0mm you are now datumed.
- If the figure is out of calibration by a large amount, direct entry of the correct figure is possible. Simply enter the correct figure in step 5 and the machine will be datumed.
- To lock parameters just turn the power off and back on.
Published 5th October 2018


