Calibrating the backgauge on a hydraulic guillotine is more than just good practice, it can, and frequently does make all the difference. You might think the process is a long and convoluted one when you start to factor in CNC or NC controllers but don’t worry, you won’t need a degree in computer sciences, just our handy guide in conjunction with this useful video over on our YouTube channel.
Focusing on our most popular controllers; the Cybtouch 6 and Cybtouch 8 let’s have a look at a step-by-step guide to getting the job done correctly:
OK, your machine is on, purring and ready to serve you well once calibrated. The first step is to program the backgauge to approximately 50mm then hit the green start button to send your backgauge to position.
When the red ‘Stop’ button changes to a green ‘OK’ notification then it’s time to take a test cut and check the size of it. In a perfect world the cut should be 50mm, however if the backgauge does in fact need calibrating it may be less or more, so accurate measuring of your test piece with a digital gauge will tell you all you need to know at this point.
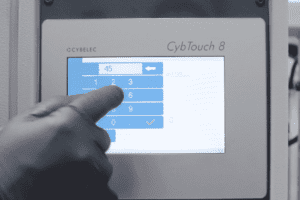
You might notice on the video that our test piece came out at 45.10mm so some re-programming of the datum is needed, so it’s back to the touchscreen on your Cybtouch 6/8…
Press the menu button in the bottom left hand corner and from the next screen simply select ‘current program’, then press the menu button once more and from this screen select ‘other menus’, from here select the ‘service’ option, then ‘service’ once again.
This will bring up exactly what we need: the screen for calibrating your X-axis. The first line will have a numerical value on the right hand side (you’ll notice on our demonstration model it is currently set to 49.98, simply pressing on this figure will bring up a number pad to adjust it. To do this you will need to input the code which allows you to make such changes, set to ‘333’ this should take you back to the previous screen.
Touching that same numerical value will again open up the number screen once more. Now you should input the actual size of your test piece (you might recall in our tutorial video it measured 45.10mm, yours will most likely be different, input it and select the tick icon to enter.
From the next screen select ‘menu’ and then the green ‘start’ icon in the bottom right hand corner, and very quickly you are ready to take another cut, a cut which should hopefully be the perfect size, job done!
For more information on our range of hydraulic guillotines, CNC controllers and for help and advice on calibration, click, tap or call us on +44 (0)1432 346 580, email [email protected] or get in touch via our website
Published 20th August 2018

