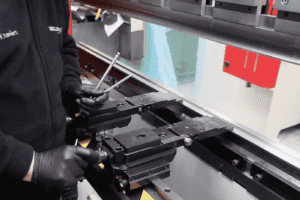
Learn how to re-align the backgauge bar, reset the datum on the probes and then reset the datum to the computer on our range of Pressbrakes. For the purposes of this demonstration we have 50.7 on the right, 50.56 on the left. The probe to the right-hand side obviously is 0.14mm larger in size. To adjust this, we need to undo two bolts underneath the backgauge bar. Then adjust the grub screw on the front and rear to bring the actual backgauge wheel forward, to make it parallel, checking with the probe and getting the correct dimension on the left and then on the right.
Undo the screws which bolt the bar to the plate as demonstrated in the video. Once you have done that you will need to loosen the grub screws at the front and rear of the probe. By slackening one grub screw off, you will need to tighten the other, for it to move in one direction. To move it in the opposite direction, reverse the process so, it will move in the other direction.
Once this has been done, check the measurements once again and repeat the process until the backgauge is parallel.
When the backgauge is parallel then check to see if the probes are parallel. To do this undo the screws as demonstrated in the video and release off the grub screws. Using the adjustment knob on the probe carefully adjust to the measurement you require whilst taking the measurement at the same time from the front of the probes. When you have got to your optimum measurement lock the probe into position. Turn the grub screws lightly on the front and rear, back and forward, until they stop and gently nip the one at the rear. It is important that you don’t try to adjust the adjustment knob without undoing everything first. If you try to move the adjustment knob without undoing everything you find it is very stiff and you won’t be able to move it, if you are able to move it you will be damaging the knob itself.
Now that the backgauge and the probes are parallel the final thing to do is to set the X-Axis Datum to the correct size. The easiest way to do this is to access the parameters in the Control Panel. Enter the code: 851414, press enter, okay. Arrow across until you see the X-Axis parameters.
The reference position in our demonstration is 754.85. Write the reference position figure down on a piece of paper to ensure you know where you started from. If your backgauge is out by 0.1 then basically increase it by 0.1 or decrease it by 0.1. Once you have made your adjustment, come out of the parameters. To Editor. Pick a figure, we chose 50mm. Semi-automatic. Run.
Now that the parameter has been adjusted, it needs to be re-referenced and checked.
Press the manual as normal. Press start. Here you’ll find the backgauge R and X are now re-datuming. Once they’ve re-datumed, it can be adjusted to 50mm. And check the distance, watch us demonstrate how.
Published 4th July 2016

